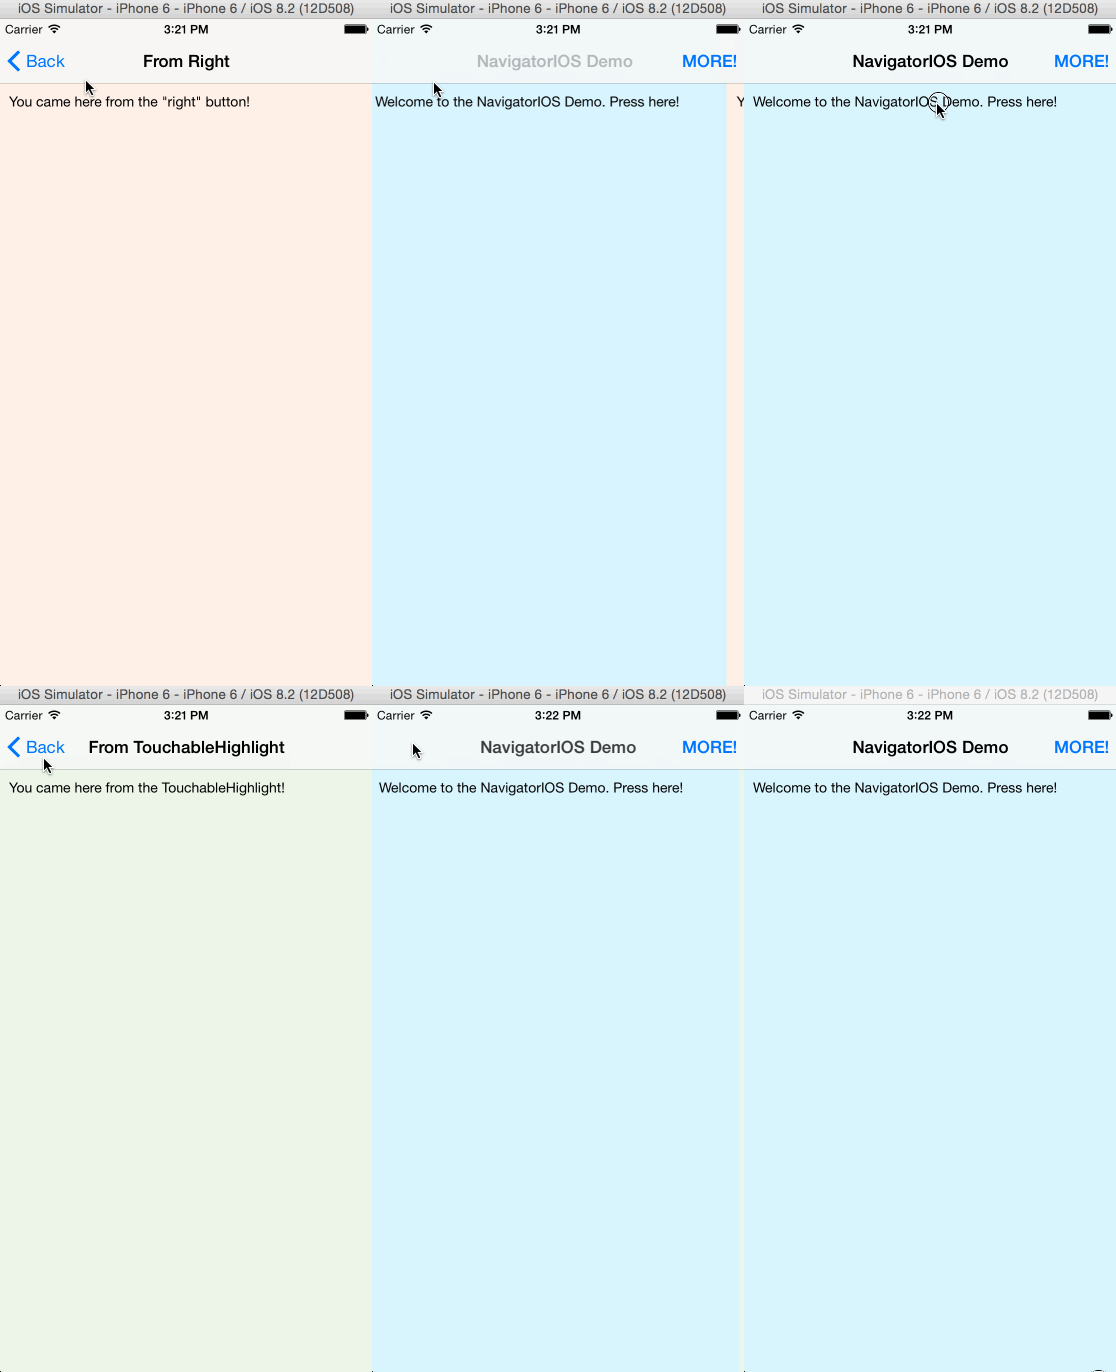
In order to have multiple screens in an app, we need a method of moving between them. React Native provides the NavigatorIOS component which does exactly this and I’ve been having a play around with its basic usage. Here’s the result:

First up, let’s set up all of our module includes and whatnot:
'use strict';

var React = require('react-native');
var {
  AppRegistry,
  StyleSheet,
  Text,
  View,
  NavigatorIOS,
  TouchableHighlight
} = React;
Standard stuff - notice that we require the NavigatorIOS component. Now on to the main app component:
var NavDemo = React.createClass({
    onRightButtonPress: function() {
        this.refs.nav.push({
            title: 'From Right',
            component: ForRightScene
        })
    },

    render () {
        return (
            <NavigatorIOS ref="nav" style={styles.container} initialRoute={{
                component: HomeScene,
                title: 'NavigatorIOS Demo',
                rightButtonTitle: 'MORE!',
                onRightButtonPress: this.onRightButtonPress
            }} />
        );
    }
});
Ah, there you are NavigatorIOS! The important bit is the initialRoute prop, which is supplied with some fairly self-explanatory values: component - the first component to be shown inside the NavigatorIOS, in this case HomeScene; title - the initial text inside the navigation toolbar; rightButtonTitle - the text for the button on the right side of the toolbar; onRightButtonPress - a handler function for when that button is pressed.
Notice too that we’ve added a ref prop to the NavigatorIOS which allows us to grab a reference to it from our onRightButtonPress handler. In there, we call the push method on the NavigatorIOS - which is part of its underlying Navigator instance - with the same kind of parameters as we used for the initialRoute, but this time we’re passing in a component called ForRightScene which we’ll look at shortly. First though, let’s take a look at the HomeScene.
var HomeScene = React.createClass({
    onPress() {
        this.props.navigator.push({
            title: 'From TouchableHighlight',
            component: ForTouchScene
        });
    },

    render() {
        return (
            <View style={[styles.scene, {backgroundColor: '#DAF6FF'}]}>
                <TouchableHighlight onPress={this.onPress}>
                    <Text>Welcome to the NavigatorIOS Demo. Press here!</Text>
                </TouchableHighlight>
            </View>
        );
    }
});
The guts of this is a TouchableHighlight that triggers the onPress handler. Because components under the control of the NavigatorIOS will always have a navigator prop automatically set, we can grab that and use it to push a new component - ForTouchScene - into the routing stack.
The what? Oh, the routing stack. Every time you push a new scene component it gets added to a stack of routes that you can later pop. This gives you a history of all the scenes that you’ve navigated and allows you to step back through them. The NavigatorIOS will have a back button in cases where there’s a stack and will auto-pop components when the back button’s pressed.
That’s pretty much it. The ForTouchScene and ForRightScene components look like this:
var ForRightScene = React.createClass({
    render() {
        return (
            <View style={[styles.scene, {backgroundColor: '#FFF1E8'}]}>
                <Text>You came here from the "right" button!</Text>
            </View>
        );
    }
});


var ForTouchScene = React.createClass({
    render() {
        return (
            <View style={[styles.scene, {backgroundColor: '#ECF6E8'}]}>
                <Text>You came here from the TouchableHighlight!</Text>
            </View>
        );
    }
});
Super-simple. The rest of the app looks like this:
var styles = StyleSheet.create({
    container: {
        flex: 1
    },
    scene: {
        padding: 10,
        paddingTop: 74,
        flex: 1
    }
});

AppRegistry.registerComponent('rctnavigator', () => NavDemo);
There’s one slight quirk here which is that unless you specify otherwise, your content will be hidden under the navigation toolbar. To counter this, we set a top padding of 64 to clear the nav bar and an additional ten on top of that to balance it with the padding for the other sides. We use this in our components like this:
{[styles.scene, {backgroundColor: '#FFF1E8'}]}This technique - using an array of styles - allows us to combine two sets of styling, using one as a base and another which is specific to this particular component.
Hopefully this whistle-stop tour of NavigatorIOS will help you get to grips with it. The full source code is on Github and don’t forget to look at the documentation for more details.